

Advent Prayer Bags
Materials needed: prayer sheet, felt or paper star, felt or paper heart, pipe cleaner, baby Jesus stone, tea candle, a bag (an organza drawstring bag if available)
Instructions: Find a smooth oval-shape stone. This will be your “Jesus stone.” Paint a baby Jesus on the stone -- (black and brown sharpies or markers work well.) You may like to cover the finished painting with glossy mod podge.
Make/gather the needed items listed under “materials” and fill a bag with one of each item. You may want to make a bag for each family member or just use one bag as a family daily prayer time.
Following is the prayer sheet to place in the bag:
Week One: HOPE
What do you hope for?
- Light the candle and ask God to bring God’s light and hope to people who are finding life hard.
Week Two: LOVE
Who do you love?
- Hold the heart and say thank you to God for all the people you love and who love you.
Week Three: JOY
What brings you joy?
- Bend the pipe cleaner into a symbol for something that makes you happy. Ask God to help those who are sad to feel God’s joy.
Week Four: PEACE
The wise men followed the star to search for Jesus. Hold the star and pray for all those who are searching for peace in a troubled world.
CHRISTMAS DAY
Make a special bed for your baby Jesus stone toile in and light your candle again. Thank God for sending Jesus to be a light in the darkness and trouble of the world. Pray that you will be a light in the darkness too.
From: Flamecreativekids.com
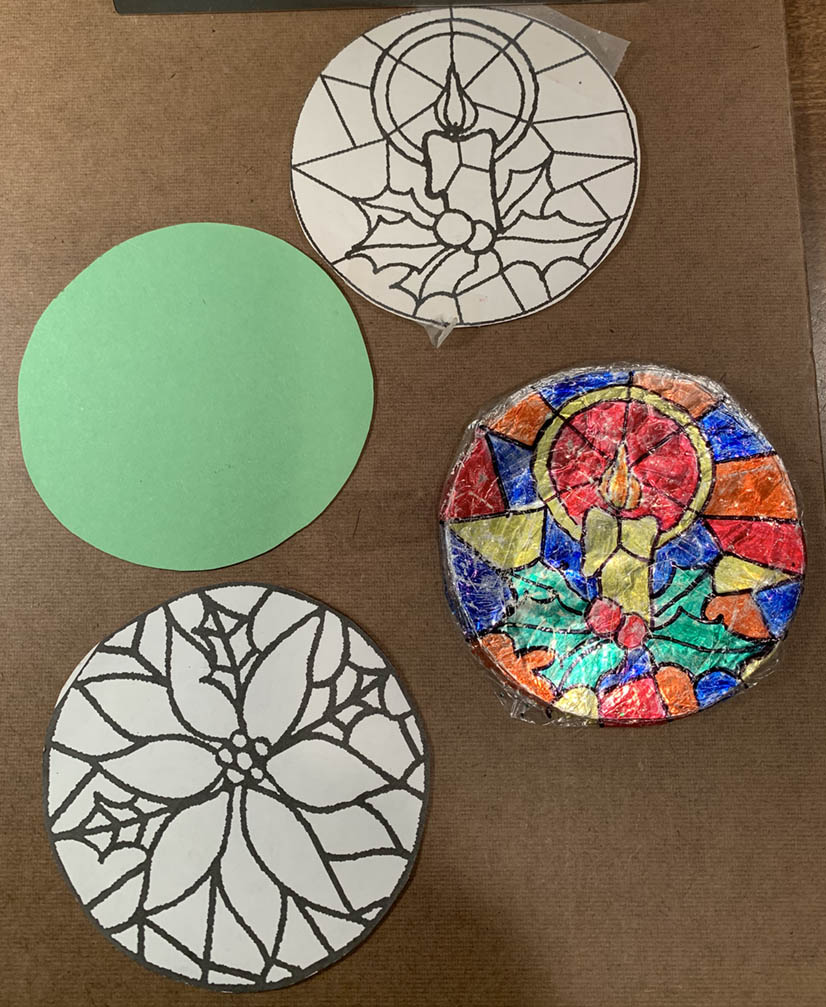
Stained Glass Ornament
Materials needed:
- Black permanent magic markers with pointed tips (fine point or similar) for tracing
- variety colored permanent markers, fine /medium point
- copies of pattern
- card stock or poster board
- aluminum foil
- plastic food wrap
- tape
- thread or ribbon for hanging (optional)
- clipboard (optional)
Instructions:
- Tape the pattern to the table (or onto a clipboard); then cover the pattern with plastic wrap (name brands work best), large enough to cover the design and a little beyond; tape the plastic wrap to the table /clipboard over the pattern (be sure that the drawing is centered under the plastic wrap, and stretch the plastic wrap slightly so that it is smooth and taut); tape the plastic on all four corners as well as the centers of all the sides - 8 pieces of tape. If the plastic wrap is loose, it will be hard to draw on. Cut out the circle after the crafter has colored it and then affix it (later step) with plastic wrap.)
- Color the design (on top of the plastic wrap). It may be easier to color all the open areas first, and then draw the black outlines later. Otherwise you might touch the black lines with the tip of the marker, and it could smear onto your color. When tracing the black lines, take your time - that is the most important part of the project. Make sure you trace each black line.
- Cut out 2 circles from poster board or cardstock. Cover one side of the circle with foil - shiny side out!
- Center the plastic wrap with the picture on top of the foil covered circle. (Make sure the ink side is facing toward the foil!) Wrap the plastic wrap around the back and secure with tape. Place the second circle on the back, covering up all the plastic wrap and foil ends, giving it a more finished look.
- To make a hanger, use a large needle and thread because a hole punch will disrupt the tension of the plastic wrap.
Download templates here.